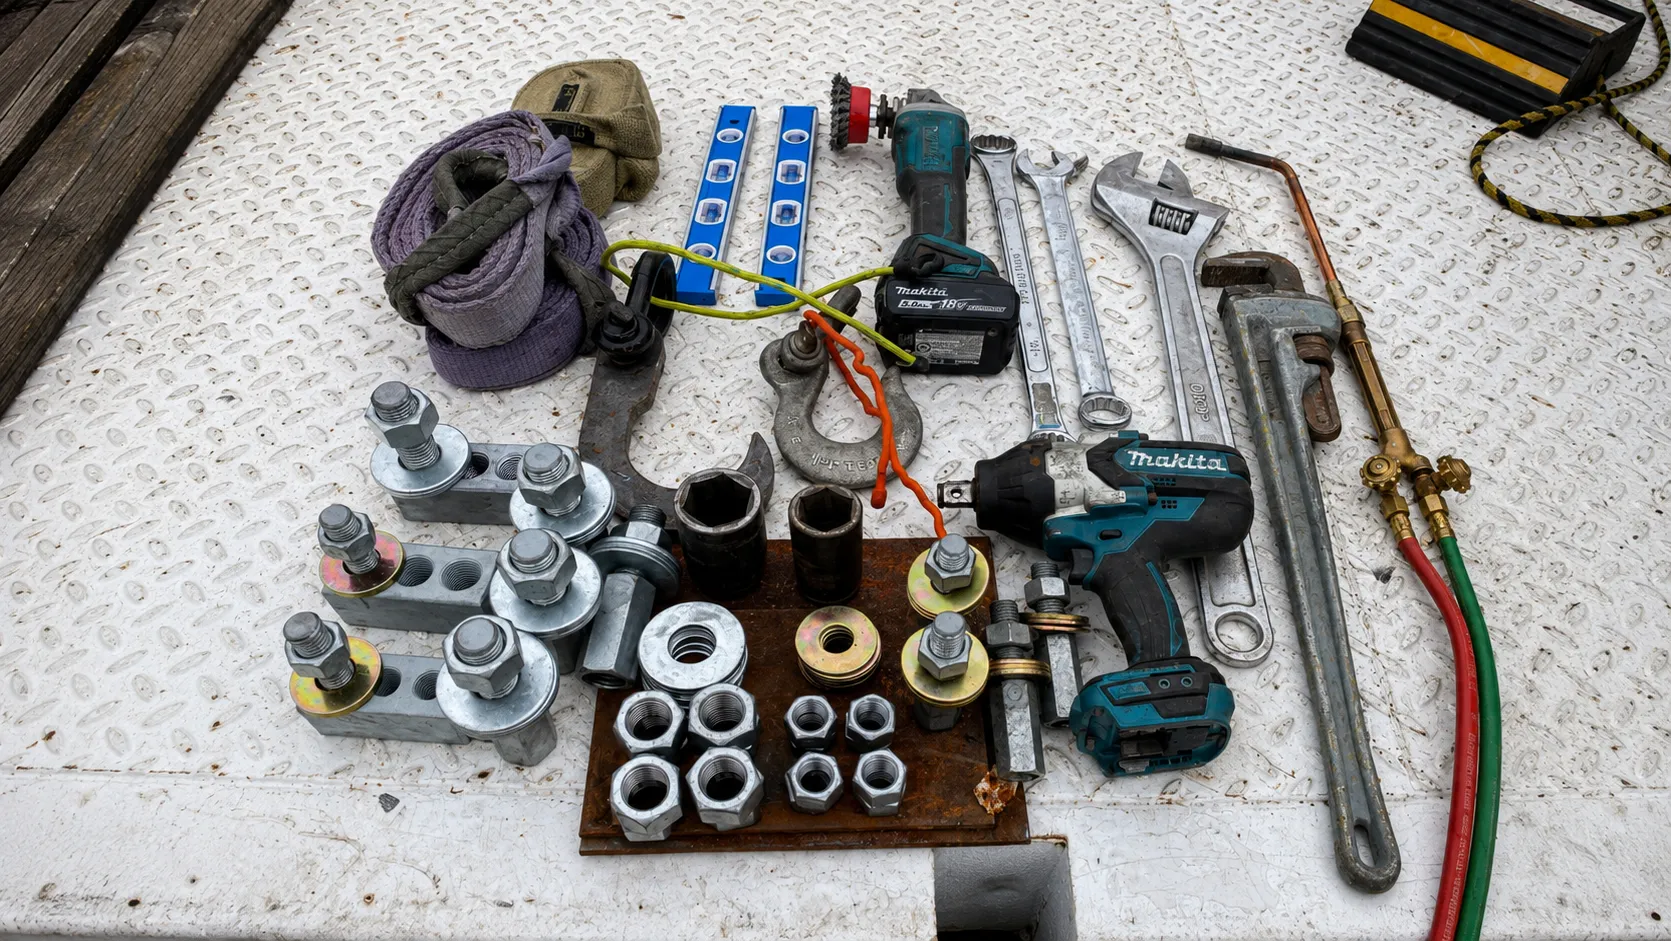
Replacing an existing light pole can become much more complicated once work begins at the foundation. Rusted anchor nuts, damaged threads, drypack around the base, mismatched bolt patterns, and difficult lifting conditions can all turn what appears to be a straightforward replacement into a much longer job.
Having the right light pole replacement tools on site can help qualified contractors and maintenance professionals work more efficiently and identify problems before they cause additional delays.
Based on decades of experience working with exterior lighting systems, here are 10 tools and pieces of equipment that can be especially useful when replacing an anchor-base light pole.
Safety Note: Light pole replacement can involve electrical systems, heavy lifting, rigging, cutting or heating equipment, and structural components. Work should be performed by properly trained and qualified personnel following applicable safety requirements, project specifications, manufacturer instructions, and engineering requirements.
Key Takeaways
- Bring the tools needed for both routine hardware removal and severely corroded anchor nuts.
- Use properly rated lifting and rigging equipment designed for the pole and load.
- Clean and inspect existing anchor bolts before deciding whether they can be reused.
- Measure the anchor bolt size and bolt pattern before installing or ordering replacement components.
- Problems such as short anchor bolts or mismatched bolt patterns may sometimes be addressed without replacing the entire concrete footing.
Quick List: 10 Tools for Light Pole Replacement
The tools and equipment we recommend having available include:
- Trailer ball wrench or combination box-end wrench
- Two magnetic bullet levels
- Proper lifting straps, slings, and rigging equipment
- Oxygen-acetylene torch with Rosebud tip and appropriate heat protection
- Jackhammer or rotary hammer with chipping bit
- Wire wheel and angle grinder
- New light pole hardware
- Rust-encapsulating or corrosion-resistant coating
- Cordless impact wrench with deep sockets
- Pipe wrench
The exact tools required will depend on the pole, foundation, anchor bolt condition, jobsite conditions, and installation requirements.
1. Trailer Ball Wrench or Combination Box-End Wrench
A trailer ball wrench or combination box-end wrench can be particularly useful for removing and installing light pole anchor nuts.
Common wrench sizes worth having available include:
- 1-1/8 inch for a 3/4-inch standard nut
- 1-1/4 inch for a 3/4-inch heavy hex nut
- 1-1/2 inch for a 1-inch standard nut
- 1-5/8 inch for a 1-inch heavy hex nut
Before ordering replacement hardware, however, do not determine the anchor bolt size based only on the outside dimensions of the nut. The nominal anchor bolt diameter and the physical size of the corresponding nut are different measurements.
For instructions on identifying the actual bolt diameter, see our guide on how to measure light pole anchor bolt size.
2. Two Magnetic Bullet Levels
Two magnetic bullet levels can make leveling a light pole much easier.
Instead of repeatedly moving one level from one side of the pole to another, place magnetic levels on two appropriate sides of the pole so the pole can be checked in two directions during positioning and leveling.
This makes it easier to monitor the pole as adjustments are made to the leveling hardware.
Always follow the pole manufacturer’s installation requirements, project specifications, and applicable engineering requirements when setting and leveling a light pole.
3. Proper Lifting Straps, Slings, and Rigging Equipment
Proper lifting equipment is one of the most important things to plan before removing or positioning a light pole.
Depending on the pole and approved lifting method, the equipment may include padded lifting straps, slings, hooks, or another appropriate rigging arrangement.
The lifting equipment should:
- Be properly rated for the load.
- Be appropriate for the pole and lifting method.
- Protect the pole finish from unnecessary scratching or damage.
- Maintain control of the pole during lifting and positioning.
- Be inspected before use.
Never use the light fixtures themselves as lifting points.
The exact lifting arrangement will vary by pole configuration and jobsite conditions, so rigging should be selected and performed by properly trained personnel.
For additional safety information, review the OSHA requirements for rigging equipment used for material handling.

4. Oxygen-Acetylene Torch With Rosebud Tip and Heat Protection
Severely rusted anchor nuts can sometimes resist conventional hand tools and impact equipment.
For qualified personnel, an oxygen-acetylene torch fitted with a Rosebud heating tip may be used in certain situations to heat heavily corroded hardware rather than immediately cutting the nut away.
When heating hardware around the base of a light pole, particular care must be taken because electrical wiring may be located inside or near the pole.
Appropriate heat shielding, fire prevention measures, electrical safety procedures, and jobsite controls are essential.
This is not a procedure that should be attempted without the necessary training and experience.
For applicable requirements regarding this equipment, see OSHA’s gas welding and cutting safety requirements.
Electrical circuits should also be properly controlled before applicable work begins. OSHA provides additional requirements regarding lockout and tagging of electrical circuits.
Watch: How to Remove Rusted Anchor Nuts
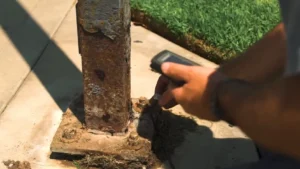
Rusted anchor nuts are a common problem on older exterior light pole foundations. This Light Pole Systems Tech Tip provides a practical overview of removing heavily rusted anchor nuts. For detailed step-by-step information, see our guide to removing rusted anchor nuts from light pole anchor bolts.
5. Jackhammer or Rotary Hammer With a Chipping Bit
Some light pole foundations have drypack, grout, concrete, or other material covering the leveling nuts and anchor bolt hardware.
A jackhammer or rotary hammer with an appropriate chipping bit can be useful for carefully removing material that prevents access to the existing hardware.
Once the material has been removed, the exposed foundation area can be evaluated and the anchor bolts, nuts, washers, and leveling hardware can be inspected.
If the leveling hardware is buried below the base plate, see how to safely access light pole leveling nuts.
Take care around existing anchor bolts and electrical components. Damaging an otherwise usable anchor bolt while trying to gain access to it creates an entirely new problem, which is a rather expensive way to make progress.
6. Wire Wheel and Angle Grinder
Years of exposure to moisture, landscape irrigation, dirt, and outdoor conditions can leave light pole anchor bolts and hardware covered with rust and debris.
A wire wheel and angle grinder can help clean exposed hardware so its actual condition can be evaluated.
Cleaning may help expose:
- Anchor bolt threads
- Nuts
- Washers
- Surface corrosion
- Damaged threads
- Areas of significant material loss
Do not assume an anchor bolt is structurally usable simply because surface rust has been removed.
If there is significant corrosion, deterioration, cracking, deformation, or uncertainty about the condition of the foundation or anchor bolts, the appropriate qualified professional should evaluate the installation.
Clean threads are also much easier to measure accurately. See how to measure an anchor bolt correctly before ordering replacement hardware.
7. New Light Pole Hardware
Do not arrive at a replacement project assuming all of the existing nuts, washers, and leveling hardware should automatically be reused.
Depending on the installation, replacement hardware may include:
- Anchor nuts
- Washers
- Leveling nuts
- Other pole-specific hardware
Replacement components must be compatible with the existing anchor bolts and the requirements of the new light pole.
This is especially important with galvanized anchor bolts and nuts. Galvanized hardware requires compatible components, and the physical dimensions of a nut should not be confused with the nominal diameter of the anchor bolt.
Verify the existing hardware before ordering replacements.
8. Rust-Encapsulating or Corrosion-Resistant Coating
After existing anchor bolts have been cleaned, evaluated, and determined to be suitable for continued use, an appropriate corrosion-resistant or rust-encapsulating coating may help protect exposed steel from additional environmental exposure.
The proper product and surface preparation depend on the condition of the steel, existing coatings, environment, and project requirements.
Coatings should not be treated as a structural repair for badly deteriorated anchor bolts.
If corrosion is severe enough that the integrity of the anchor bolt is questionable, the underlying condition needs to be addressed rather than simply covered.
For more information on identifying deterioration and understanding when corrosion may become a structural concern, see our guide to light pole corrosion.
9. Cordless Impact Wrench With Deep Sockets
A 1/2-inch or 3/4-inch impact wrench with the appropriate deep sockets can save considerable time when removing and installing light pole anchor nuts.
Deep sockets are useful because light pole anchor bolts may extend significantly above the nut.
A cordless impact wrench can also reduce the amount of manual wrenching required and makes it easier to move around the foundation without an air hose or power cord.
However, an impact wrench is not a cure for every rusted nut. Severely corroded hardware may require cleaning or another appropriate removal method before it will move.
10. Pipe Wrench
A heavy-duty pipe wrench is another useful tool to keep available for severely rusted hardware.
When corrosion has damaged the flats of an anchor nut enough that a conventional socket or wrench can no longer grip it effectively, a pipe wrench may provide another option for obtaining mechanical grip.
As with any heavily corroded hardware, evaluate the condition of the anchor bolt itself while removing the nut. The goal is not simply to get the nut off. You also need to know whether the anchor bolt underneath is suitable for the replacement installation.
Inspect the Existing Anchor Bolts Before Installing the Replacement Pole
Removing the old pole often reveals conditions that could not be completely evaluated beforehand.
Before placing the replacement pole, inspect the existing foundation and anchor bolts for issues such as:
- Severe corrosion
- Damaged or missing threads
- Bent anchor bolts
- Insufficient exposed thread
- Mismatched anchor bolt patterns
- Cracked or deteriorated concrete
- Incorrect anchor bolt size
- Differences between the existing footing and the new pole base plate
This inspection is important because the correct solution depends on what is actually wrong with the existing installation.
If the Existing Anchor Bolts Are Too Short
If the existing anchor bolts are otherwise suitable for continued use but do not provide enough usable thread for the new installation, a Light Pole Systems Thread Extender may provide additional usable length.
Thread Extenders are available for common light pole anchor bolt sizes and are designed specifically for situations where usable existing anchor bolts need additional threaded length.
If the New Pole Does Not Match the Existing Bolt Pattern
A replacement pole can have the correct general dimensions and still have a base plate that does not match the anchor bolts in the existing concrete footing.
Before ordering or installing the replacement pole, verify both the anchor bolt diameter and the bolt pattern.
In certain mismatched-pattern situations, a Light Pole Systems Anchor Bolt Adapter can allow the existing foundation to remain in use while accommodating differences between the footing and replacement pole.
For unusual configurations, Custom Adapter Plates may also be available.
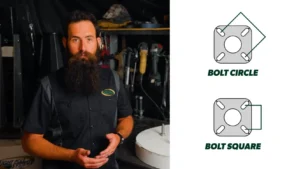
Watch: How to Measure Light Pole Bolt Patterns
Knowing the difference between a bolt circle and a bolt square is important when documenting an existing light pole foundation.
Watch this Tech Tip before ordering a replacement pole or adapter:
For additional measurement instructions, read How to Measure Light Pole Anchor Bolt Size.
What If the Existing Anchor Bolts Cannot Be Reused?
Not every foundation problem can be solved by cleaning the existing hardware.
If the existing anchor bolts cannot be reused and the concrete footing is appropriate for the proposed repair, one possible approach may involve installing new all-thread anchor bolts into the existing concrete using an engineered anchoring system.
Because drilling, hole cleaning, adhesive selection, embedment depth, edge distance, loads, concrete condition, and other engineering requirements can affect the installation, this should never be treated as simply drilling a hole and adding epoxy.
For a detailed overview, see our guide on how to install anchor bolts in an existing concrete footing.
Measure Before You Order the Replacement Pole
One of the easiest ways to avoid delays is to document the existing foundation before the replacement pole arrives.
Whenever possible, verify:
- Anchor bolt diameter
- Thread pitch
- Amount of usable exposed thread
- Number of anchor bolts
- Bolt circle or bolt square
- Condition of the anchor bolts
- Pole base-plate dimensions
- Condition of the concrete footing
Do not measure one pole on a property and automatically assume every other pole uses the same foundation.
Properties are frequently built or modified in phases, and poles that appear similar may have different anchor bolt patterns or come from different manufacturers.
For more examples of problems that can occur during replacement projects, read 3 Common Light Pole Problems and How to Prevent Them.
Light Pole Replacement Tool Checklist
Before heading to the jobsite, confirm that the required equipment for the specific project is available.
A basic preparation checklist may include:
- Trailer ball wrench or combination box-end wrench
- Magnetic bullet levels
- Properly rated lifting straps and rigging
- Appropriate equipment for difficult or rusted nuts
- Jackhammer or rotary hammer with chipping bit
- Wire wheel
- Angle grinder
- Replacement nuts, washers, and hardware
- Appropriate corrosion protection
- Cordless impact wrench
- Deep sockets
- Pipe wrench
- Measuring tools or calipers
- Required PPE
- Documentation for the replacement pole
- Existing foundation and bolt-pattern measurements
A few minutes spent checking equipment and measurements before work begins can prevent hours of unnecessary delay once the old pole has been removed.
Frequently Asked Questions About Light Pole Replacement Tools
What tools are commonly needed to replace a light pole?
Common light pole replacement tools include wrenches, magnetic levels, properly rated lifting and rigging equipment, an impact wrench with deep sockets, cleaning tools such as a wire wheel or grinder, replacement hardware, and tools for dealing with corroded anchor nuts or material covering the foundation hardware.
The exact equipment required depends on the pole, foundation, anchor bolts, and jobsite conditions.
What size wrench do I need for light pole anchor bolts?
The required wrench size depends on the anchor nut and bolt combination. Common sizes include 1-1/8 inch for a 3/4-inch standard nut, 1-1/4 inch for a 3/4-inch heavy hex nut, 1-1/2 inch for a 1-inch standard nut, and 1-5/8 inch for a 1-inch heavy hex nut.
Do not use the outside dimensions of the nut alone to determine the nominal anchor bolt diameter. Measure the threaded portion of the anchor bolt whenever possible.
How do you remove rusted light pole anchor nuts?
The appropriate method depends on the severity of the corrosion. Cleaning, penetrating products, hand tools, impact equipment, a pipe wrench, or professional heating methods may be used depending on the condition.
Before applying heat or performing work around the base of a pole, electrical and fire hazards must be properly controlled by qualified personnel.
Watch our video on how to remove rusted anchor nuts for an overview.
What if the existing light pole anchor bolts are too short?
If the existing anchor bolts are suitable for continued use but do not provide enough usable thread, a Thread Extender may provide additional threaded length without replacing the entire concrete footing.
What if the replacement light pole does not match the existing anchor bolts?
First verify the existing anchor bolt diameter and bolt pattern and compare them with the replacement pole base plate.
For certain mismatched bolt patterns, an Anchor Bolt Adapter can provide a solution without requiring replacement of the existing footing.
Prepare for the Problems You May Find Below the Pole
The best light pole replacement toolkit does more than help remove the old pole.
It should also help you inspect what remains after the pole is removed.
Corroded hardware, short anchor bolts, damaged threads, and mismatched bolt patterns are much easier to address when they are identified early and accurately measured.
Light Pole Systems specializes in products designed to solve common light pole foundation and replacement problems, including Anchor Bolt Adapters, Thread Extenders, and custom solutions for unusual field conditions.
If you are dealing with an unusual light pole or anchor bolt problem, contact Light Pole Systems and provide the available pole, foundation, and anchor bolt measurements so our team can help identify possible solutions.